(!)Due to Microsoft's end of support for Internet Explorer 11 on 15/06/2022, this site does not support the recommended environment.
Instead, please kindly use other browsers like Google Chrome, Microsoft Edge or Mozilla Firefox.

ideanote
inCAD Library

Please read before use

What is inCAD Library?

  • Helpful application examples for mechanical engineers.

The Concept of inCAD Library

  • Online application library with a range of ideas for all manufacturing industries.
  • Save design time and learn new design applications when you are concepting new machines.

Disclaimer

  • MISUMI may not offer all parts in each application design. Available parts can only be purchased separately not as a unit shown in each application design.
  • MISUMI does not guarantee quality, accuracy, functionality, safety or reliability for the combination of the parts in each application example. Accept these points prior to use.
  • 2014 Copyright MISUMI
  • The data cannot be used for any purposes (including sales promotion) except for designing your machine.
  • All associated CAD is free. Misumi reserves the right at its sole discretion to cancel, terminate or modify this offer.
  • MISUMI may change, add or delete application examples posted without prior notice.
  • MISUMI assumes no responsibilities for any damage incurred resulting from your use of the Service or any change, addition or deletion by MISUMI of the application examples for any reason whatsoever.

inCAD Library Features

  1. Get great new design ideas for these application examples.
  2. Over 300 design application ideas
    collected from dozens of industries!

  3. Find application examples quickly! Search by function, workpiece shape, etc.

  4. Download the CAD models for each application example.
  5. Log in to download free CAD models.
    Download CAD for the entire application example!

Good IDEA! button

Click the Good IDEA! Button when you like an application example!

*Can only be clicked once per application example.

  • Upper right corner on the page of application example details

  • Pop-up dialog for CAD data downloading

Page top

Keyword Search
No. Search

No.000068 Conveyor with Escapement

Escapement mechanism for gravity conveyor

Relevant category

Engineering plastic bearing

Product name Engineered Plastic Bearings - Flat
Part number EBH26
* Orange colored cells in the table below indicate the part numbers used in this example.

Selection criteria

Lightweight and economical as Guides and Stoppers

Back to page top

Risk info.

May be damaged by impact loads.

Back to page top

Available sizes

■Engineered plastic bearing (Flat type, With hex socket, Threaded)

Material Surface treatment
Surface resin Bearing Ring Shaft
Polyacetal 404C Stainless Steel 304 Stainless Steel -
52100 Bearing Steel Carbon Steel Trivalent chromate
Anti-static
Polyacetal
404C Stainless Steel(Low particle generation) 304 Stainless Steel -
304 Stainless Steel(Low particle generation)
MC Nylon 52100 Bearing Steel 1045 Carbon Steel
UHMWPE Trivalent Chromate

■Sizes and Dimensions

O.D.(mm) Bore DIA.(mm) Bearing used
13 4 L-1044ZZ
14
16 5 695ZZ
18
19 6 696ZZ
20
22
24
26 8 608ZZ
30
35
40 10 6200ZZ
45
50

Back to page top

Performance info.

■Speeds and loads of Engineered Plastic Bearings

O.D.
(mm)
Load capacity
(N)
13 29.4
14
16
18
19 78.4
20
22
24
26 176
30
35
40 245
45
50

Back to page top

Cantilever shaft

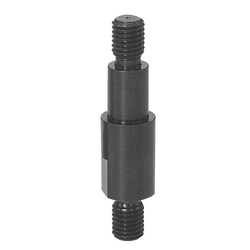
Product name Cantilever Shafts - Standard, Both Ends Threaded
Part number PFXAC6-22-F7-MA6
* Orange colored cells in the table below indicate the part numbers used in this example.

Selection criteria

Shape, configurable size and low cost.

Back to page top

Available sizes

■Cantilever shaft (Standard, Thread length fixed)

Material Surface treatment
1045 Carbon Steel Black oxide
Electroless nickel plating
304 Stainless Steel
4137 Alloy Steel
Hardness 30~40HRC
Electroless nickel plating

■Sizes and Dimensions

Shaft DIA.
(mm)
Shaft section length
(Configure in 1mm increments)
Screw DIA. (M Coarse)
3 3-50 3
4 3、4
5 3、4、5
6 5-100 4、5、6
8 5、6、8
10 6、8、10
12 10-100 6、8、10、12
13 6、8、10、12
15 8、10、12
16 10、12、16、20
17 6、8、10、12、(15)
18 8、10、12、(15)
20 10、12、(15)、16、20、
22
25 10、12-24(4Increment)、(15)、(25)
30 12-24(4Increment)、(15)、(25)、30

*M15 and M25 of ( ) dimensions of Screw DIA. will be fine threads.

Back to page top

Accuracy Info

■Accuracy of Cantilever shafts

Perpendicularity: 0.02

(mm)

Shaft DIA. O.D. Tolerance
g6
3 -0.002
-0.008
4 -0.004
-0.012
5
6
8 -0.005
-0.014
10
12 -0.006
-0.017
13
15
16
17
18
20 -0.007
-0.020
22
25
30

Back to page top

Bearings with housing

Product name Bearings with Housings - Direct Mount, Standard, Retained
Part number SBGRA626ZZ
* Orange colored cells in the table below indicate the part numbers used in this example.

Selection criteria

Supports Cantilever shaft and it's easy to install.

Back to page top

Available sizes

■Bearing with housing (With retaining ring, Round type)

Material Surface treatment
Bearing Housing Housing
Steel 1045 Carbon Steel Black oxide
Electroless nickel plating
2017 Aluminum Alloy Clear anodize
Stainless steel
304 Stainless Steel -

■Bearing type

Bearing model number Bore DIA. I.D.
(Bearing O.D.)
Seal
606 6 17 ZZ(Double shielded)
VV(Non-contact rubber seal)
DD(Contact rubber seal)
626 19
698 8

Back to page top

Accuracy Info

■Accuracy of bearings with housing

(mm)

Shaft DIA. I.D.
I.D. Tolerance: H7
5 14 +0.018
0
16
6 17
19 +0.021
0
8 19
22
24

Back to page top

IDEA NOTE Workpiece stocking

To prevent queuing of the workpieces cantilever arm also acts as a stopper/separator between two workpieces.

  • TERMS AND CONDITIONS FOR USE OF CAD DATA
    Your access to the CAD data that MISUMI Corporation (hereinafter referred to as the Company) posts on this site (including 3D CAD data, intermediate 3D CAD data and 2D CAD data; hereinafter referred to as the Data) are of products manufactured and/or sold by the Company (hereinafter referred to as the Products) assumes that you have read and accepted these terms and conditions which govern your use of the Data. If you do not agree to these terms and conditions, you must stop using this website and the Data. You must not use the Data for any unlawful purpose or in any manner inconsistent with these terms and conditions.
    1. CAD Data
    The Data is prepared for assisting the Company's users in the CAD design process by providing dimensions and other Product information. In order to provide the best speed and stability working within this site, the Product drawings were simplified to reduce the size of the Data. For instance, some of the Products are shown without the oil groove shape, screws or spring shape. Also, please be aware that the tolerance, surface roughness and/or chamfer of the Data may vary from the actual Products.
    2. Disclaimer on Data
    While the Company has carefully prepared the Data, accuracy of the Data is not guaranteed and is subject to the variances as described above. The Company may also modify, add or delete the Data at any time without prior notice. The Company assumes no liability for any direct, indirect, consequential or special damages that you may claim resulted from your use of the Data or any changes to or deletions of the Data regardless of the reason. The Company provides no warranty as to the quality, accuracy, functionality, safety or reliability of the combination of Products and parts. Example applications and combinations of the Products are provided for illustrative purposes only.
    3. Copyright
    Copyrights to the content and the Data belong to the Company or the manufacturers of the Products. The said copyright is protected by the Copyright Act and international treaties. The use (including duplication, modification, uploading, posting, transmission, distribution, licensing, sales and publishing) of the Data except for the purpose to use the Data described above without prior approval of the Company is not allowed. The Data cannot be used for any purposes (including sales promotion) except for designing your machine. If you violate this provision or the laws or regulations, the Company may prohibit you from the use of the Data, the Company’s site and/or take legal action. So long as you comply with these terms and conditions, the Company grants to you a non-exclusive, non-transferable, revocable license to access and use the Data for the sole purpose of assisting you in designing machines that incorporate products.
    In case that the CAD data is found to have been to be used for any purpose other than mentioned above or against the related laws, MISUMI may take legal actions, including the one for blocking the involved user from using CAD data and from accessing to the MISUMI site.
    4. Disclaimer of Warranty
    ANY AND ALL CONTENT APPEARING ON THIS WEB SITE IS PROVIDED FOR INFORMATIONAL PURPOSES ONLY. THIS WEB SITE, ITS CONTENT AND ITS LINKS ARE PROVIDED ON AN "AS IS" AND "AS AVAILABLE" BASIS AND ARE USED ONLY AT YOUR SOLE RISK, TO THE FULLEST EXTENT PERMISSIBLE BY LAW. THE COMPANY DISCLAIMS ALL WARRANTIES, EXPRESS OR IMPLIED, OF ANY KIND, REGARDING THIS WEB SITE (INCLUDING ITS CONTENT, HARDWARE, SOFTWARE AND LINKS), INCLUDING AS TO FITNESS FOR A PARTICULAR PURPOSE, MERCHANTABILITY, TITLE, NON INFRINGEMENT, RESULTS, ACCURACY, COMPLETENESS, ACCESSIBILITY, COMPATIBILITY, SECURITY AND FREEDOM FROM COMPUTER VIRUS. THE COMPANY WILL NOT BE LIABLE FOR ANY DAMAGES OR LOSSES, INCLUDING DIRECT, INDIRECT, CONSEQUENTIAL, SPECIAL, INCIDENTAL OR PUNITIVE DAMAGES AND/OR LOST PROFITS, IN CONNECTION WITH USE OF THE INTERNET, THIS WEB SITE, ITS CONTENT OR ITS LINKS
    Further, the Company will not be liable to you for any failure or delay by the Company to provide access to the Data or any of its obligations under these terms and conditions where such failure or delay is the direct or indirect result of any circumstances beyond the Company's reasonable control (and the Company's obligations will be suspended for the duration of such circumstances).

    CAD Download (Unit Assembly)

    CAD Download: File Format
    生成

    Thank you for downloading the data.

    Click the Good IDEA! button when you find interesting design tips.


    This data is utilized in order to list more useful application examples in the future.

    CAD Data Limitations

    1. Assembly data shows the assembly drawings in the concept design phase. The sole purpose of the data is to explain the structure and functionality of the assembly and is not considered nor to be used as a final design.
      You will need to edit the Data so that it meets your specific design conditions.
    2. Unit assembly Data consists of some sub-assemblies.
      It is configured so that each sub-assembly unit can be used as it is or edited.
    3. * The part in the frame is a sub-assembly unit.

    4. The Data for fabricated parts is based on easy-to-edit dimensions and shapes in sketches and histories.
    5. The Data including the third-part components are made by the Company.

    Page top

  • * Unit assembly Data consists of some sub-assemblies.
       It is configured so that each sub-assembly unit can be used as it is or edited.

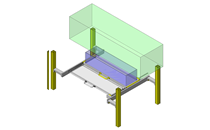
Application Overview

Purpose

  • Design simple and low cost conveyor that requires no motor power sources but utilizes gravity (weight of the material) to move the load.
  • Points for Use
    When the cylinder head is raised:
    The first workpiece is moving along cantilever arm and is stopped by the cylinder. At that time: back of the cantilever arm moves up and stops the second workpiece. Second workpiece is also sitting on the catilever arm.
    When the cylinder head is lowered:
    First workpiece is moves to next position using gravity and incline of cantilever arm, while back of the cantilever arm is pulled back by spring to its home (horizontal) position. At the same time cylinder head raises up and second workpiece using gravity moves forward untill it hits cylinder stopper head.

Target workpiece

  • Cardboard box filled with products.
    External dims.: W170 x D120 x H195
    Workpiece weight: 5.0kg

Design Specifications

Operating Conditions or Design Requirements

  • Motion stroke: 250mm
  • External dimensions: W600 x D260 x H346

Required Performance

  • Total weight of components occupying conveyor: 100N

Selection Criteria for Main Components

  • Tension spring
    • A tension spring is used to return the cantilevered to the down position.
  • Cylinder with guide
    • Used as stop of initial (first) workpiece.
  • Shock absorbing stopper
    • Bumper with low elasticity rubber is selected to absorb shocks on parts.
  • Engineering plastic bearing
    • Select a type with ample load capacity.

Design Evaluation

Verification of main components

  • Verify if the spring can actuate the cantilever arm according to the position of the material (workpiece) on the rollers.
  • Tension spring load
    • Loads and spring deflection of cantilever arm varies with workpiece position
      ① Load F1 (N) - when workpiece is sitting on the top of the front roller
      ② Load F2 (N) - when back of cantilever arm is completely raised up
      ③ Load F3 (N) - when workpiece is not
    • Formula: Reaction force F = kx + Initial tension
    • Spring constant: Temporarily select k = 1.32N/mm
    • Initial tension = 4.71N
    • Max. designed deflection amount: x = 12mm (when set 1mm, when stroked 12mm)
    • (1) is,
      ① F1= 50N ⇒ Supported in 2 places, 25N
      ② F2 = 1.32N/mm x 12mm + 4.71N = 21N
      ③ F3 = 1.32N/mm × 1mm + 4.71N = 6N
      Therefore ①>②>③holds and selected spring constant k = 1.32/mm is correct.
  • Cylinder w/guide
    • Cylinder is used as a stopper.
    • Workpiece weight 5kg < 30kg (Max. weight)
    • Conveyance speed 15m/min < 30m/min (Max. speed)
      Therefore, the range is suitable.
  • Engineered plastic bearing
    • Since one workpiece is supported by 6 bearings,
      load on each bearing = 50N / 6 ≒ 8.5N
      therefore 8.5N < 176N (Load capacity)

Other Design Consideration

  • Since the tension spring is mounted on frame slots, tension adjustments are possible.
  • When the load travels on the conveyor, front and rear rollers of the cantilevered arms are moving by contacting the load.
  • Since the conveyor rollers are mounted on the extruded Aluminum frame slots, roller pitch can be adjusted.
  • The cantilevered arms are coupled together so right and left actuation is synchronized on individual load points.
  • In order to reduce the friction on the load as it moves down the conveyor resin rollers are used.

Explore Similar Application Examples

Page - / -

Part List

No. Part Name Sample Picture MISUMI Part Number
(click the Part Number below for details)
Quantity
1 Resins Bearing EBH26 4
2 Stopper Bolts EBH13 4
3 Rotary Shaft UNSTH6-40 4
4 Metal Washers PFXAC6-22-F7-MA6 4
5 Bearing W/Housing WSSM10-6-3 4
6 Spring Anchors SBGRA626ZZ 4
7 Squair Post AIPOK6-30 8
8 Spring SLSBJF8-126.5-M4-N4-G3-H3 4
9 Resins Bearing AUU10-35 4
10 Resins Bearing EBH30 28
11 Resin Plates EBH35 26
12 Brackets for Aluminum Extrusion MCA2H-70-25-7-F40-G12.5-Z3 1
13 Casters HBLTS6-SET 16
14 Aluminum Extrusion HCFT6-60-SET 4
15 Aluminum Extrusion HFS6-3030-200 4
16 Aluminum Extrusion HFS6-3030-480 2
17 Aluminum Extrusion HFS6-3060-600 2
18 Aluminum Extrusion HFS6-3060-158 2
19 Nuts For Aluminum Extrusion HFS6-3060-180 2
20 End Caps for Aluminum Extrusion HNTT6-6 86
21 End Caps for Aluminum Extrusion HFC6-3060-B 4
22 Flow Rate Control Valves HFC6-3030-B 4
23 Socket Head Cap Screws-with Washer SPSNL6-M5 2
24 Socket Head Cap Screws-with Washer SCBS4-10 8
25 Socket Head Cap Screws-with Washer SCBS5-10 4
26 Socket Head Cap Screws-with Washer SCBS5-15 20
27 Aluminum Extrusion SCBS6-15 20
  • The part list above only contains MISUMI parts.
    Part list download (CSV) includes MISUMI and third party components used in this example.
  • TERMS AND CONDITIONS FOR USE OF CAD DATA
    Your access to the CAD data that MISUMI Corporation (hereinafter referred to as the Company) posts on this site (including 3D CAD data, intermediate 3D CAD data and 2D CAD data; hereinafter referred to as the Data) are of products manufactured and/or sold by the Company (hereinafter referred to as the Products) assumes that you have read and accepted these terms and conditions which govern your use of the Data. If you do not agree to these terms and conditions, you must stop using this website and the Data. You must not use the Data for any unlawful purpose or in any manner inconsistent with these terms and conditions.
    1. CAD Data
    The Data is prepared for assisting the Company's users in the CAD design process by providing dimensions and other Product information. In order to provide the best speed and stability working within this site, the Product drawings were simplified to reduce the size of the Data. For instance, some of the Products are shown without the oil groove shape, screws or spring shape. Also, please be aware that the tolerance, surface roughness and/or chamfer of the Data may vary from the actual Products.
    2. Disclaimer on Data
    While the Company has carefully prepared the Data, accuracy of the Data is not guaranteed and is subject to the variances as described above. The Company may also modify, add or delete the Data at any time without prior notice. The Company assumes no liability for any direct, indirect, consequential or special damages that you may claim resulted from your use of the Data or any changes to or deletions of the Data regardless of the reason. The Company provides no warranty as to the quality, accuracy, functionality, safety or reliability of the combination of Products and parts. Example applications and combinations of the Products are provided for illustrative purposes only.
    3. Copyright
    Copyrights to the content and the Data belong to the Company or the manufacturers of the Products. The said copyright is protected by the Copyright Act and international treaties. The use (including duplication, modification, uploading, posting, transmission, distribution, licensing, sales and publishing) of the Data except for the purpose to use the Data described above without prior approval of the Company is not allowed. The Data cannot be used for any purposes (including sales promotion) except for designing your machine. If you violate this provision or the laws or regulations, the Company may prohibit you from the use of the Data, the Company’s site and/or take legal action. So long as you comply with these terms and conditions, the Company grants to you a non-exclusive, non-transferable, revocable license to access and use the Data for the sole purpose of assisting you in designing machines that incorporate products.
    In case that the CAD data is found to have been to be used for any purpose other than mentioned above or against the related laws, MISUMI may take legal actions, including the one for blocking the involved user from using CAD data and from accessing to the MISUMI site.
    4. Disclaimer of Warranty
    ANY AND ALL CONTENT APPEARING ON THIS WEB SITE IS PROVIDED FOR INFORMATIONAL PURPOSES ONLY. THIS WEB SITE, ITS CONTENT AND ITS LINKS ARE PROVIDED ON AN "AS IS" AND "AS AVAILABLE" BASIS AND ARE USED ONLY AT YOUR SOLE RISK, TO THE FULLEST EXTENT PERMISSIBLE BY LAW. THE COMPANY DISCLAIMS ALL WARRANTIES, EXPRESS OR IMPLIED, OF ANY KIND, REGARDING THIS WEB SITE (INCLUDING ITS CONTENT, HARDWARE, SOFTWARE AND LINKS), INCLUDING AS TO FITNESS FOR A PARTICULAR PURPOSE, MERCHANTABILITY, TITLE, NON INFRINGEMENT, RESULTS, ACCURACY, COMPLETENESS, ACCESSIBILITY, COMPATIBILITY, SECURITY AND FREEDOM FROM COMPUTER VIRUS. THE COMPANY WILL NOT BE LIABLE FOR ANY DAMAGES OR LOSSES, INCLUDING DIRECT, INDIRECT, CONSEQUENTIAL, SPECIAL, INCIDENTAL OR PUNITIVE DAMAGES AND/OR LOST PROFITS, IN CONNECTION WITH USE OF THE INTERNET, THIS WEB SITE, ITS CONTENT OR ITS LINKS
    Further, the Company will not be liable to you for any failure or delay by the Company to provide access to the Data or any of its obligations under these terms and conditions where such failure or delay is the direct or indirect result of any circumstances beyond the Company's reasonable control (and the Company's obligations will be suspended for the duration of such circumstances).

    CAD Download (Unit Assembly)

    CAD Download: File Format
    生成

    Thank you for downloading the data.

    Click the Good IDEA! button when you find interesting design tips.


    This data is utilized in order to list more useful application examples in the future.

    CAD Data Limitations

    1. Assembly data shows the assembly drawings in the concept design phase. The sole purpose of the data is to explain the structure and functionality of the assembly and is not considered nor to be used as a final design.
      You will need to edit the Data so that it meets your specific design conditions.
    2. Unit assembly Data consists of some sub-assemblies.
      It is configured so that each sub-assembly unit can be used as it is or edited.
    3. * The part in the frame is a sub-assembly unit.

    4. The Data for fabricated parts is based on easy-to-edit dimensions and shapes in sketches and histories.
    5. The Data including the third-part components are made by the Company.

    Page top

Page top