(!)Due to Microsoft's end of support for Internet Explorer 11 on 15/06/2022, this site does not support the recommended environment.
Instead, please kindly use other browsers like Google Chrome, Microsoft Edge or Mozilla Firefox.

ideanote
inCAD Library

Please read before use

What is inCAD Library?

  • Helpful application examples for mechanical engineers.

The Concept of inCAD Library

  • Online application library with a range of ideas for all manufacturing industries.
  • Save design time and learn new design applications when you are concepting new machines.

Disclaimer

  • MISUMI may not offer all parts in each application design. Available parts can only be purchased separately not as a unit shown in each application design.
  • MISUMI does not guarantee quality, accuracy, functionality, safety or reliability for the combination of the parts in each application example. Accept these points prior to use.
  • 2014 Copyright MISUMI
  • The data cannot be used for any purposes (including sales promotion) except for designing your machine.
  • All associated CAD is free. Misumi reserves the right at its sole discretion to cancel, terminate or modify this offer.
  • MISUMI may change, add or delete application examples posted without prior notice.
  • MISUMI assumes no responsibilities for any damage incurred resulting from your use of the Service or any change, addition or deletion by MISUMI of the application examples for any reason whatsoever.

inCAD Library Features

  1. Get great new design ideas for these application examples.
  2. Over 300 design application ideas
    collected from dozens of industries!

  3. Find application examples quickly! Search by function, workpiece shape, etc.

  4. Download the CAD models for each application example.
  5. Log in to download free CAD models.
    Download CAD for the entire application example!

Good IDEA! button

Click the Good IDEA! Button when you like an application example!

*Can only be clicked once per application example.

  • Upper right corner on the page of application example details

  • Pop-up dialog for CAD data downloading

Page top

Keyword Search
No. Search

No.000240 Round Pin Escape & Carry

A mechanism to re-arrange the pitch of workpieces in a stocking mechanism.

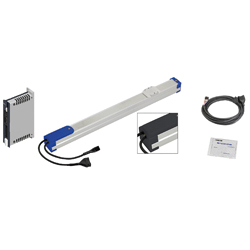
Single Axis Robot

Product name Single Axis Robots RS2 - Linear
Part number RS212-C1-N-3-150
Features Max. Load Capacity: 10kg (Horizontal), 2kg (Vertical); Stroke: 50~800mm; Max. Velocity: 1000mm/sec
* Orange colored cells in the table below indicate the part numbers used in this example.

Selection criteria

Single axis robot is selected by pitch arrangement.

Available sizes

■Single Axis Robots RS2 - Linear

Height
(mm)
Type Lead
(mm)
Stroke
(specify in 50mm increment)
59 RS1 2 50-400
6
12
57 RS2 6 50-800
12
20
60 RS3 6 50-800
12
20

Back to page top

Selection steps

■Single Axis Robot Selection Step

Load Capacity

Stroke

Cycle Time or Max. Velocity

Check for Details

Back to page top

Accuracy Info

Single Axis Robot Accuracy

Height
(mm)
Type Lead
(mm)
Stroke
(specify in 50mm increment)
Positioning Repeatability
(mm)
59 RS1 2 50-400 ±0.02
6
12
57 RS2 6 50-800 ±0.02
12
20
60 RS3 6 50-800 ±0.02
12
20

Back to page top

Performance info.

■Speed/Load of Single Axis Robot (Load Information)

Type Lead
(mm)
Max Load Capacity (kg) Allowable Moment (N・m) Max. Velocity (mm/s)
Horizontal Vertical Pitching Yawing Rolling Stroke(mm)
50 100 150 200 250 300 350 400
RS1 2 6 4 19 16 17 100
6 4 2 300
12 2 1 400~600
Type Lead
(mm)
Max Load Capacity (kg) Allowable Moment (N・m) Max. Velocity (mm/s)
Horizontal Vertical Pitching Yawing Rolling Stroke(mm)
50~600 650 700 750 800
RS2 6 10 2 33 25 30 300 280 250 220 190
12 6 1 400~600 560 500 440 380
20 4 - 350~1000 933 833 733 633
Type Lead
(mm)
Max Load Capacity (kg) Allowable Moment (N・m) Max. Velocity (mm/s)
Horizontal Vertical Pitching Yawing Rolling Stroke(mm)
50~600 650 700 750 800
RS3 6 12 4 38 32 34 300(250) 280(250) 250 220 190
12 8 2 400~600(500) 560(500) 500 440 380
20 6 - 350~1000 933 833 733 633

Values in ( ) are for vertical application.

Back to page top

Technical calculations

■Technical Calculation of Single Axis Robot

http://fawos.misumi.jp/FA_WEB/robot/select1.php?lang=en

Back to page top

Welded Steel Stands

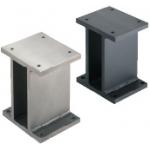
Product name Welded Steel Stands- Plate Type
Part number YSFP100-B50-H125-F30-G80-M6
* Orange colored cells in the table below indicate the part numbers used in this example.

Selection criteria

Selected a welded steel stand to absorb vibration and prevent mis-catching.

Available sizes

■Welded Steel Stands- Plate Type

Material Surface Treatment
1018 Carbon Steel -
Black Oxide Coating
Electroless Nickel Plating
304 Stainless Steel -

■Sizes and Dimensions

Type Horizontal Vertical Height Vertical Hole Pitch Horizontal Hole Pitch Hole Type Selection
No Surface Treatment


Black Oxide Coating


Electroless Nickel Plating


Stainless Steel
100 50 50~200 15 ≦ Vertical Hole Pitch
≦ Vertical - 20
80 M6 Tap


φ6.5
60
70
80
100
120 50 90~100
60
70
80
100
120
150 50 105~130
60
70
80
100
120
150
200 50 130~180
60
70
80
100
120
150
200

Back to page top

Adjusting Stopper Screw Set

Product name Adjusting Stopper Screws- Hexagon Socket, L Configurable, Fine Thread
Part number ANBNS5-25
* Orange colored cells in the table below indicate the part numbers used in this example.

Selection criteria

Suitable for height adjustment and fine tuning.

Available sizes

■Adjusting Stopper Screws- Hexagon Socket, L Configurable, Fine Thread

Adjusting Stopper Screw Material Hardness Surface Treatment
Fine Thread 1045 Carbon Steel 45-50HRC Electroless Nickel Plating
Trivalent Chromate
4137 Alloy Steel 50HRC-
304 Stainless Steel
420 Stainless Steel 45HRC-
Coarse Thread 1045 Carbon Steel 45-50HRC Electroless Nickel Plating
4137 Alloy Steel 50HRC- Trivalent Chromate
304 Stainless Steel
420 Stainless Steel 45HRC-

■Sizes and Dimensions

Screw Shaft Dia.(mm) Length(mm)
3 10-40 (every 5 pitch)
4 10-50 (every 5 pitch), 60
5 10-50 (every 5 pitch), 60
6 15-50 (every 5 pitch), 60

Back to page top

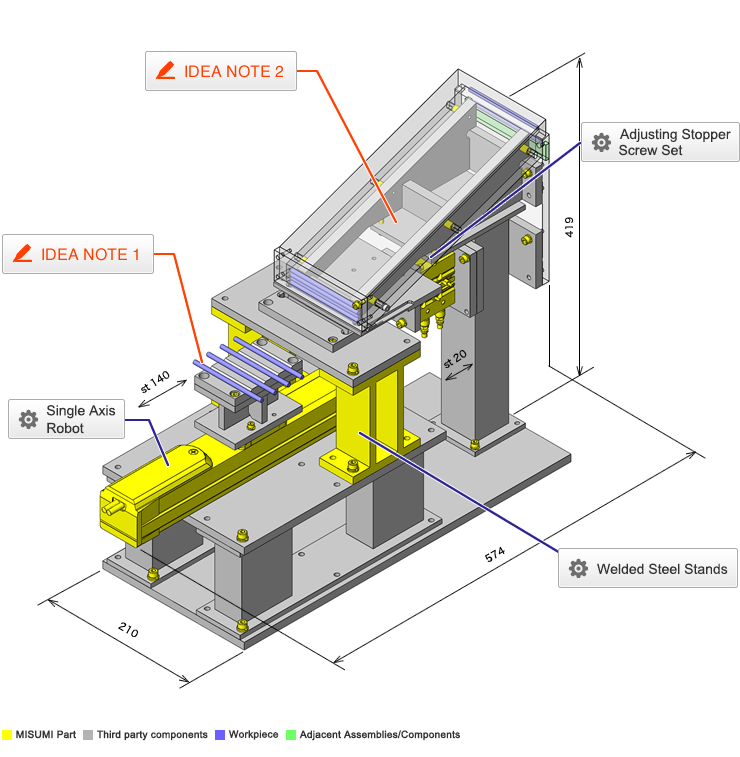
IDEA NOTE Workpieces in a push-push arrangement are cut out one by one for pitch arrangement.

Work pieces are arranged in an even pitch layout by picking them up one by one from a random grouping.

IDEA NOTE Adjusting work supply height

The work piece supply height is adjusted by the adjustment screw, the angle is set for optimal work piece ejection.

  • TERMS AND CONDITIONS FOR USE OF CAD DATA
    Your access to the CAD data that MISUMI Corporation (hereinafter referred to as the Company) posts on this site (including 3D CAD data, intermediate 3D CAD data and 2D CAD data; hereinafter referred to as the Data) are of products manufactured and/or sold by the Company (hereinafter referred to as the Products) assumes that you have read and accepted these terms and conditions which govern your use of the Data. If you do not agree to these terms and conditions, you must stop using this website and the Data. You must not use the Data for any unlawful purpose or in any manner inconsistent with these terms and conditions.
    1. CAD Data
    The Data is prepared for assisting the Company's users in the CAD design process by providing dimensions and other Product information. In order to provide the best speed and stability working within this site, the Product drawings were simplified to reduce the size of the Data. For instance, some of the Products are shown without the oil groove shape, screws or spring shape. Also, please be aware that the tolerance, surface roughness and/or chamfer of the Data may vary from the actual Products.
    2. Disclaimer on Data
    While the Company has carefully prepared the Data, accuracy of the Data is not guaranteed and is subject to the variances as described above. The Company may also modify, add or delete the Data at any time without prior notice. The Company assumes no liability for any direct, indirect, consequential or special damages that you may claim resulted from your use of the Data or any changes to or deletions of the Data regardless of the reason. The Company provides no warranty as to the quality, accuracy, functionality, safety or reliability of the combination of Products and parts. Example applications and combinations of the Products are provided for illustrative purposes only.
    3. Copyright
    Copyrights to the content and the Data belong to the Company or the manufacturers of the Products. The said copyright is protected by the Copyright Act and international treaties. The use (including duplication, modification, uploading, posting, transmission, distribution, licensing, sales and publishing) of the Data except for the purpose to use the Data described above without prior approval of the Company is not allowed. The Data cannot be used for any purposes (including sales promotion) except for designing your machine. If you violate this provision or the laws or regulations, the Company may prohibit you from the use of the Data, the Company’s site and/or take legal action. So long as you comply with these terms and conditions, the Company grants to you a non-exclusive, non-transferable, revocable license to access and use the Data for the sole purpose of assisting you in designing machines that incorporate products.
    In case that the CAD data is found to have been to be used for any purpose other than mentioned above or against the related laws, MISUMI may take legal actions, including the one for blocking the involved user from using CAD data and from accessing to the MISUMI site.
    4. Disclaimer of Warranty
    ANY AND ALL CONTENT APPEARING ON THIS WEB SITE IS PROVIDED FOR INFORMATIONAL PURPOSES ONLY. THIS WEB SITE, ITS CONTENT AND ITS LINKS ARE PROVIDED ON AN "AS IS" AND "AS AVAILABLE" BASIS AND ARE USED ONLY AT YOUR SOLE RISK, TO THE FULLEST EXTENT PERMISSIBLE BY LAW. THE COMPANY DISCLAIMS ALL WARRANTIES, EXPRESS OR IMPLIED, OF ANY KIND, REGARDING THIS WEB SITE (INCLUDING ITS CONTENT, HARDWARE, SOFTWARE AND LINKS), INCLUDING AS TO FITNESS FOR A PARTICULAR PURPOSE, MERCHANTABILITY, TITLE, NON INFRINGEMENT, RESULTS, ACCURACY, COMPLETENESS, ACCESSIBILITY, COMPATIBILITY, SECURITY AND FREEDOM FROM COMPUTER VIRUS. THE COMPANY WILL NOT BE LIABLE FOR ANY DAMAGES OR LOSSES, INCLUDING DIRECT, INDIRECT, CONSEQUENTIAL, SPECIAL, INCIDENTAL OR PUNITIVE DAMAGES AND/OR LOST PROFITS, IN CONNECTION WITH USE OF THE INTERNET, THIS WEB SITE, ITS CONTENT OR ITS LINKS
    Further, the Company will not be liable to you for any failure or delay by the Company to provide access to the Data or any of its obligations under these terms and conditions where such failure or delay is the direct or indirect result of any circumstances beyond the Company's reasonable control (and the Company's obligations will be suspended for the duration of such circumstances).

    CAD Download (Unit Assembly)

    CAD Download: File Format
    生成

    Thank you for downloading the data.

    Click the Good IDEA! button when you find interesting design tips.


    This data is utilized in order to list more useful application examples in the future.

    CAD Data Limitations

    1. Assembly data shows the assembly drawings in the concept design phase. The sole purpose of the data is to explain the structure and functionality of the assembly and is not considered nor to be used as a final design.
      You will need to edit the Data so that it meets your specific design conditions.
    2. Unit assembly Data consists of some sub-assemblies.
      It is configured so that each sub-assembly unit can be used as it is or edited.
    3. * The part in the frame is a sub-assembly unit.

    4. The Data for fabricated parts is based on easy-to-edit dimensions and shapes in sketches and histories.
    5. The Data including the third-part components are made by the Company.

    Page top

  • * Unit assembly Data consists of some sub-assemblies.
       It is configured so that each sub-assembly unit can be used as it is or edited.

Application Overview

Purpose

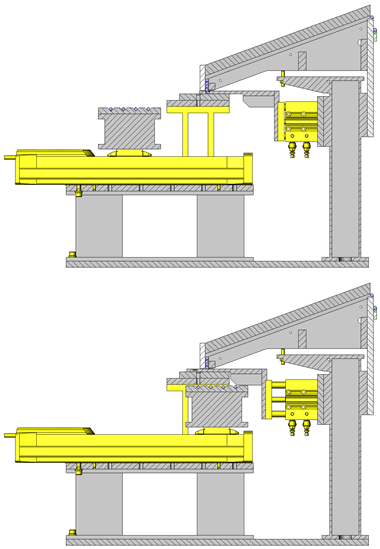
  • A mechanism to eject workpieces one by one and arrange them in a pitched layout from a stocker.

Points for use

  • Automated mechanism utilizing the stroke of a cylinder.
  • Specifying stand-by position for single axis robot (20mm pitch).

Target workpiece

  • Cylinder shape
  • Exterior shape: φ5 x L100 (stainless steel) mm
  • Workpiece Mass: 16g

Design Specifications

Operating Conditions or Design Requirements

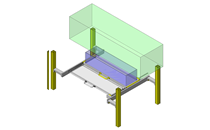
  • Exterior shape: W210 x D574 x H419mm
  • Cylinder Stroke: 20mm
  • Single axis robot stroke: 140mm
    Stand-by position: 20mm pitch

Required Performance

  • Single axis robot repeatability: +/- 0.02mm

Selection Criteria for Main Components

  • Single Axis Robot
    • A robot with maximum transferable mass is at or more the holding force needed.

Design Evaluation

Verification of main components

  • The actuators transferable mass is verified based on the holding force for the workpiece.
  • Single Axis Robot Transfer Mass
    • Condition value: Supporting post: 1040g, workpiece catcher: 70g, workpiece: 16g x 4 = 64g, bolt: 30g
    • Workpiece holding section mass M = Supporting post + Workpiece + Bolt, thus, M = (1040 + 70 + 64 + 30) x 10-3 = 1.204kg < Robot transferable mass (6kg)
      -> No problem.

Other Design Consideration

  • Pushing up the next work piece becomes easier by making the depth of the slide guide equivalent to a single work piece and the edges chamfered.
  • Horizontal leveling of the base frame is achieved by the adjusting screw.
  • The work piece drops in the middle of the stroke, and the cylinder stopper is eliminated by making the stopper the end of the 20mm stroke.

Explore Similar Application Examples

Page - / -

Part List

No. Part Name Sample Picture MISUMI Part Number
(click the Part Number below for details)
Quantity
1 Welded Steel Stands RS212-C1-N-3-150 1
2 Screw Stopper MGCLF16-20 1
3 Collars SPSNL6-M5 2
4 Dowel Pins YSFP100-B50-H125-F30-G80-M6 2
5 Socket Head Cap Screws-with Washer ANBNS5-25 2
6 Socket Head Cap Screws-with Washer KNCLSS4-8-10 6
7 Socket Head Cap Screws-with Washer MSC4-12 4
8 Socket Head Cap Screws-with Washer SCBS4-10 4
9 Socket Head Cap Screws-with Washer SCBS4-15 16
10 Socket Head Cap Screws-with Washer SCBS5-10 8
11 Socket Head Cap Screws-with Washer SCBS5-15 8
12 Sensors for Air Cylinders SCBS5-20 12
13 Metal Washers SCBS6-15 12
14 Rotary Connector SCBS6-20 30
15 Socket Head Cap Screws-with Washer ME33L1 2
  • The part list above only contains MISUMI parts.
    Part list download (CSV) includes MISUMI and third party components used in this example.
  • TERMS AND CONDITIONS FOR USE OF CAD DATA
    Your access to the CAD data that MISUMI Corporation (hereinafter referred to as the Company) posts on this site (including 3D CAD data, intermediate 3D CAD data and 2D CAD data; hereinafter referred to as the Data) are of products manufactured and/or sold by the Company (hereinafter referred to as the Products) assumes that you have read and accepted these terms and conditions which govern your use of the Data. If you do not agree to these terms and conditions, you must stop using this website and the Data. You must not use the Data for any unlawful purpose or in any manner inconsistent with these terms and conditions.
    1. CAD Data
    The Data is prepared for assisting the Company's users in the CAD design process by providing dimensions and other Product information. In order to provide the best speed and stability working within this site, the Product drawings were simplified to reduce the size of the Data. For instance, some of the Products are shown without the oil groove shape, screws or spring shape. Also, please be aware that the tolerance, surface roughness and/or chamfer of the Data may vary from the actual Products.
    2. Disclaimer on Data
    While the Company has carefully prepared the Data, accuracy of the Data is not guaranteed and is subject to the variances as described above. The Company may also modify, add or delete the Data at any time without prior notice. The Company assumes no liability for any direct, indirect, consequential or special damages that you may claim resulted from your use of the Data or any changes to or deletions of the Data regardless of the reason. The Company provides no warranty as to the quality, accuracy, functionality, safety or reliability of the combination of Products and parts. Example applications and combinations of the Products are provided for illustrative purposes only.
    3. Copyright
    Copyrights to the content and the Data belong to the Company or the manufacturers of the Products. The said copyright is protected by the Copyright Act and international treaties. The use (including duplication, modification, uploading, posting, transmission, distribution, licensing, sales and publishing) of the Data except for the purpose to use the Data described above without prior approval of the Company is not allowed. The Data cannot be used for any purposes (including sales promotion) except for designing your machine. If you violate this provision or the laws or regulations, the Company may prohibit you from the use of the Data, the Company’s site and/or take legal action. So long as you comply with these terms and conditions, the Company grants to you a non-exclusive, non-transferable, revocable license to access and use the Data for the sole purpose of assisting you in designing machines that incorporate products.
    In case that the CAD data is found to have been to be used for any purpose other than mentioned above or against the related laws, MISUMI may take legal actions, including the one for blocking the involved user from using CAD data and from accessing to the MISUMI site.
    4. Disclaimer of Warranty
    ANY AND ALL CONTENT APPEARING ON THIS WEB SITE IS PROVIDED FOR INFORMATIONAL PURPOSES ONLY. THIS WEB SITE, ITS CONTENT AND ITS LINKS ARE PROVIDED ON AN "AS IS" AND "AS AVAILABLE" BASIS AND ARE USED ONLY AT YOUR SOLE RISK, TO THE FULLEST EXTENT PERMISSIBLE BY LAW. THE COMPANY DISCLAIMS ALL WARRANTIES, EXPRESS OR IMPLIED, OF ANY KIND, REGARDING THIS WEB SITE (INCLUDING ITS CONTENT, HARDWARE, SOFTWARE AND LINKS), INCLUDING AS TO FITNESS FOR A PARTICULAR PURPOSE, MERCHANTABILITY, TITLE, NON INFRINGEMENT, RESULTS, ACCURACY, COMPLETENESS, ACCESSIBILITY, COMPATIBILITY, SECURITY AND FREEDOM FROM COMPUTER VIRUS. THE COMPANY WILL NOT BE LIABLE FOR ANY DAMAGES OR LOSSES, INCLUDING DIRECT, INDIRECT, CONSEQUENTIAL, SPECIAL, INCIDENTAL OR PUNITIVE DAMAGES AND/OR LOST PROFITS, IN CONNECTION WITH USE OF THE INTERNET, THIS WEB SITE, ITS CONTENT OR ITS LINKS
    Further, the Company will not be liable to you for any failure or delay by the Company to provide access to the Data or any of its obligations under these terms and conditions where such failure or delay is the direct or indirect result of any circumstances beyond the Company's reasonable control (and the Company's obligations will be suspended for the duration of such circumstances).

    CAD Download (Unit Assembly)

    CAD Download: File Format
    生成

    Thank you for downloading the data.

    Click the Good IDEA! button when you find interesting design tips.


    This data is utilized in order to list more useful application examples in the future.

    CAD Data Limitations

    1. Assembly data shows the assembly drawings in the concept design phase. The sole purpose of the data is to explain the structure and functionality of the assembly and is not considered nor to be used as a final design.
      You will need to edit the Data so that it meets your specific design conditions.
    2. Unit assembly Data consists of some sub-assemblies.
      It is configured so that each sub-assembly unit can be used as it is or edited.
    3. * The part in the frame is a sub-assembly unit.

    4. The Data for fabricated parts is based on easy-to-edit dimensions and shapes in sketches and histories.
    5. The Data including the third-part components are made by the Company.

    Page top

Page top