(!)Due to Microsoft's end of support for Internet Explorer 11 on 15/06/2022, this site does not support the recommended environment.
Instead, please kindly use other browsers like Google Chrome, Microsoft Edge or Mozilla Firefox.

ideanote
inCAD Library

Please read before use

What is inCAD Library?

  • Helpful application examples for mechanical engineers.

The Concept of inCAD Library

  • Online application library with a range of ideas for all manufacturing industries.
  • Save design time and learn new design applications when you are concepting new machines.

Disclaimer

  • MISUMI may not offer all parts in each application design. Available parts can only be purchased separately not as a unit shown in each application design.
  • MISUMI does not guarantee quality, accuracy, functionality, safety or reliability for the combination of the parts in each application example. Accept these points prior to use.
  • 2014 Copyright MISUMI
  • The data cannot be used for any purposes (including sales promotion) except for designing your machine.
  • All associated CAD is free. Misumi reserves the right at its sole discretion to cancel, terminate or modify this offer.
  • MISUMI may change, add or delete application examples posted without prior notice.
  • MISUMI assumes no responsibilities for any damage incurred resulting from your use of the Service or any change, addition or deletion by MISUMI of the application examples for any reason whatsoever.

inCAD Library Features

  1. Get great new design ideas for these application examples.
  2. Over 300 design application ideas
    collected from dozens of industries!

  3. Find application examples quickly! Search by function, workpiece shape, etc.

  4. Download the CAD models for each application example.
  5. Log in to download free CAD models.
    Download CAD for the entire application example!

Good IDEA! button

Click the Good IDEA! Button when you like an application example!

*Can only be clicked once per application example.

  • Upper right corner on the page of application example details

  • Pop-up dialog for CAD data downloading

Page top

Keyword Search
No. Search

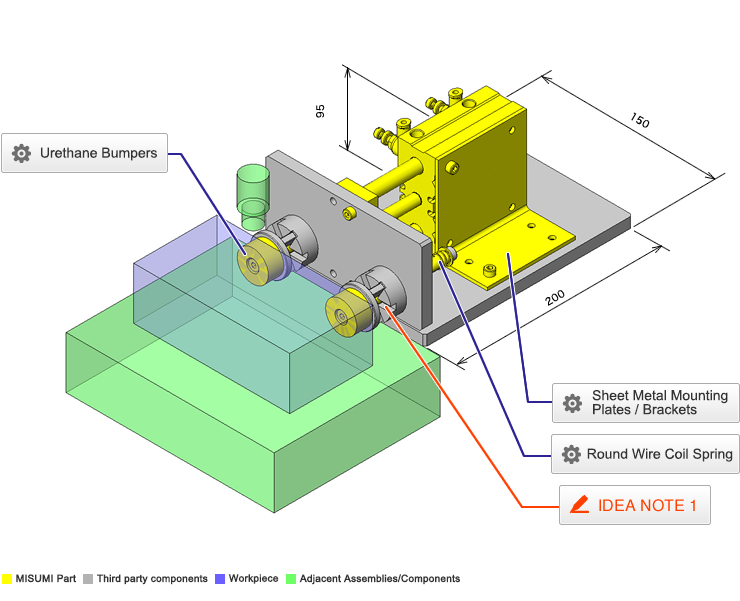
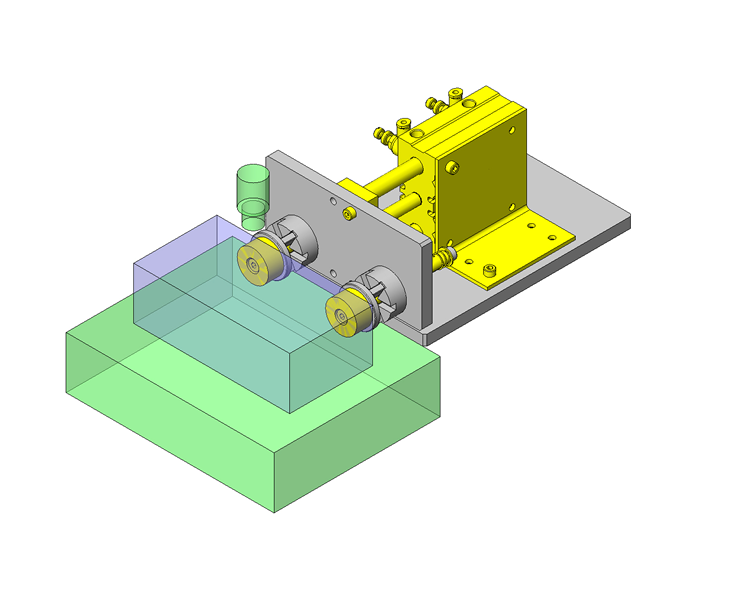
No.000164 Push Position Switch Mechanism

Easily switchable horizontal position via spring, pusher switch, and urethane bumper.

Relevant category

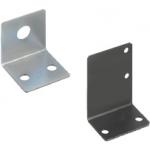
Sheet Metal Mounting Plates / Brackets

Product name Sheet Metal Mounting Plates / Brackets
Part number FANAS-SUD-T3-A85-B50-L85-X11-F60-H10.5-G64-N5-V60-S20-W20-NA5
* Orange colored cells in the table below indicate the part numbers used in this example.

Selection criteria

Suitable in such cases as fixing the linear motion system at low cost

Back to page top

Available sizes

■Sheet Metal Mounting Plates / Brackets

Material Surface Treatment Plate Thickness
Low Carbon Steel 1.6、2.3、3.2
Black Oxide
Trivalent Chromate(White)
Trivalent Chromate(Black)
Low Carbon Steel 4.5、6.0
Black Oxide
Trivalent Chromate(White)
Trivalent Chromate(Black)
5052 Aluminum Alloy 1.5、2.0、3.0、4.0、5.0
Anodize (Clear)
Anodize (Black)
304 Stainless Steel (Passivated 2B) 1.0、1.5、2.0、3.0、4.0、5.0

■External Dimensions

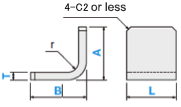
Plate Thickness Hole Dia. [A]Overall height [B]Depth [L]Overall Width
(1 mm increments)
1.0~5.0 φ3、4、5、6、8、10 22~200 22~200 26~200
6.0 22~300

* Hole positions configurable. Please see the product pages for details.

Back to page top

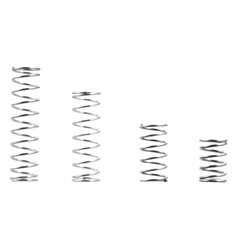
Round Wire Coil Spring

Product name Compression Springs - Inner Diameter Selectable, Stainless Steel
Part number VUR10-55
* Orange colored cells in the table below indicate the part numbers used in this example.

Selection criteria

Suitable for the tension of one-touch switching

Back to page top

Available sizes

■Compression Springs - Inner Diameter Selectable, Stainless Steel

Deflection
(Free Length ratio)
I.D. Material
60% φ5・φ6・φ8
φ10・φ12・φ16
304 Stainless Steel
45%
40%
35%

■Sizes and Dimensions (Excerpt)

I.D. Free length O.D. Wire Dia. Max. deflection
φ6 15 φ7 φ0.5 9
20 φ7.1 φ0.55 12
25 15
30 18
35 φ7.2 φ0.6 21
40 24
45 φ7.3 φ0.65 27
50 30
55 φ7.4 φ0.7 33
60 36
φ8 20 φ9.3 φ0.65 12
25 15
30 φ9.4 φ0.7 18
35 21
40 24
45 φ9.6 φ0.8 27
50 30
55 33
60 36
65 φ9.8 φ0.9 39
70 42
80 48
φ10 20 φ11.4 φ0.7 12
25 φ11.5 φ0.75 15
30 φ11.6 φ0.8 18
35 21
40 24
45 φ11.8 φ0.9 27
50 30
55 33
60 36
65 39
70 φ12 φ1 42
80 48
φ12 25 φ13.6 φ0.8 15
30 18
35 φ13.8 φ0.9 21
40 24
45 27
50 φ14 φ1 30
55 33
60 36
65 39
70 φ14.2 φ1.1 42
80 48
90 54
φ16 35 φ18 φ1 21
40 24
45 φ18.2 φ1.1 27
50 30
55 33
60 36
65 φ18.4 φ1.2 39
70 42
80 48
90 54
100 60

Back to page top

Performance info.

■Spring Constant of Round Wire Coil Spring (I.D. referenced type)

Deflection
(Free Length ratio)
Spring Constant
(N/mm)
60% 0.29
45% 0.49
40% 0.98
35% 2.94

Back to page top

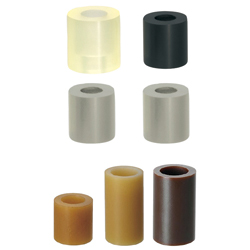
Urethane Bumpers

Product name Urethane Bumpers - Counterbored, Fully Configurable
Part number AZFS-D30-V9-H8-G12-L15-N
* Orange colored cells in the table below indicate the part numbers used in this example.

Selection criteria

Suitable for applying force without damaging workpieces.

Back to page top

Available sizes

■Urethane Bumpers - Counterbored, Fully Configurable

Accuracy Material Hardness Color
Standard Grade Standard Urethane
(Ether Polyurethane)
Shore A95 Natural color·Black
Shore A90
Standard Urethane
(Ether Polyurethane)
Shore A70
Shore A50
Shore A30
Antistatic Polyurethane Shore A90 Gray
Shore A70
Shore A50
Low Rebound Urethane Shore A70 Gray
Heat Resistant Urethane Shore A90 Brown
Super Abrasion Resistant Urethane Shore A92 Beige
Vulkollan ® Shore A68
Abrasion Resistant Urethane Shore A90 Dark Brown
Shore A70
Ceramic Urethane Shore A95 Gray
Shore A90
Shore A70
Precision Grade Standard Urethane
(Ether Polyurethane)
Shore A90 Natural color·Black
Standard Urethane
(Ether Polyurethane)
Shore A70

■Sizes

O.D. Through Hole Dia. Counterbored Hole Overall Length
(Overall Height)
Diameter Depth
1 mm increments
φ8〜φ15 φ2〜φ10 φ3〜φ90
(<O.D.-6)
1 to Length -3 6~80
φ16〜φ30 φ2〜φ16
φ31〜φ45 φ5〜φ25 1 to Length -5 10~150
φ46〜φ60 φ5〜φ30 25~150
φ61〜φ80 φ5〜φ70 25~200
φ81〜φ100

* Those with O.D.φ81 or more are in 5mm increments.

Back to page top

IDEA NOTE The clamping height can be easily changed by manual operation.

By positioning the claw of the knob at a pre-machined groove on the stopper, The horizontal pushed distance can be adjusted.

  • TERMS AND CONDITIONS FOR USE OF CAD DATA
    Your access to the CAD data that MISUMI Corporation (hereinafter referred to as the Company) posts on this site (including 3D CAD data, intermediate 3D CAD data and 2D CAD data; hereinafter referred to as the Data) are of products manufactured and/or sold by the Company (hereinafter referred to as the Products) assumes that you have read and accepted these terms and conditions which govern your use of the Data. If you do not agree to these terms and conditions, you must stop using this website and the Data. You must not use the Data for any unlawful purpose or in any manner inconsistent with these terms and conditions.
    1. CAD Data
    The Data is prepared for assisting the Company's users in the CAD design process by providing dimensions and other Product information. In order to provide the best speed and stability working within this site, the Product drawings were simplified to reduce the size of the Data. For instance, some of the Products are shown without the oil groove shape, screws or spring shape. Also, please be aware that the tolerance, surface roughness and/or chamfer of the Data may vary from the actual Products.
    2. Disclaimer on Data
    While the Company has carefully prepared the Data, accuracy of the Data is not guaranteed and is subject to the variances as described above. The Company may also modify, add or delete the Data at any time without prior notice. The Company assumes no liability for any direct, indirect, consequential or special damages that you may claim resulted from your use of the Data or any changes to or deletions of the Data regardless of the reason. The Company provides no warranty as to the quality, accuracy, functionality, safety or reliability of the combination of Products and parts. Example applications and combinations of the Products are provided for illustrative purposes only.
    3. Copyright
    Copyrights to the content and the Data belong to the Company or the manufacturers of the Products. The said copyright is protected by the Copyright Act and international treaties. The use (including duplication, modification, uploading, posting, transmission, distribution, licensing, sales and publishing) of the Data except for the purpose to use the Data described above without prior approval of the Company is not allowed. The Data cannot be used for any purposes (including sales promotion) except for designing your machine. If you violate this provision or the laws or regulations, the Company may prohibit you from the use of the Data, the Company’s site and/or take legal action. So long as you comply with these terms and conditions, the Company grants to you a non-exclusive, non-transferable, revocable license to access and use the Data for the sole purpose of assisting you in designing machines that incorporate products.
    In case that the CAD data is found to have been to be used for any purpose other than mentioned above or against the related laws, MISUMI may take legal actions, including the one for blocking the involved user from using CAD data and from accessing to the MISUMI site.
    4. Disclaimer of Warranty
    ANY AND ALL CONTENT APPEARING ON THIS WEB SITE IS PROVIDED FOR INFORMATIONAL PURPOSES ONLY. THIS WEB SITE, ITS CONTENT AND ITS LINKS ARE PROVIDED ON AN "AS IS" AND "AS AVAILABLE" BASIS AND ARE USED ONLY AT YOUR SOLE RISK, TO THE FULLEST EXTENT PERMISSIBLE BY LAW. THE COMPANY DISCLAIMS ALL WARRANTIES, EXPRESS OR IMPLIED, OF ANY KIND, REGARDING THIS WEB SITE (INCLUDING ITS CONTENT, HARDWARE, SOFTWARE AND LINKS), INCLUDING AS TO FITNESS FOR A PARTICULAR PURPOSE, MERCHANTABILITY, TITLE, NON INFRINGEMENT, RESULTS, ACCURACY, COMPLETENESS, ACCESSIBILITY, COMPATIBILITY, SECURITY AND FREEDOM FROM COMPUTER VIRUS. THE COMPANY WILL NOT BE LIABLE FOR ANY DAMAGES OR LOSSES, INCLUDING DIRECT, INDIRECT, CONSEQUENTIAL, SPECIAL, INCIDENTAL OR PUNITIVE DAMAGES AND/OR LOST PROFITS, IN CONNECTION WITH USE OF THE INTERNET, THIS WEB SITE, ITS CONTENT OR ITS LINKS
    Further, the Company will not be liable to you for any failure or delay by the Company to provide access to the Data or any of its obligations under these terms and conditions where such failure or delay is the direct or indirect result of any circumstances beyond the Company's reasonable control (and the Company's obligations will be suspended for the duration of such circumstances).

    CAD Download (Unit Assembly)

    CAD Download: File Format
    生成

    Thank you for downloading the data.

    Click the Good IDEA! button when you find interesting design tips.


    This data is utilized in order to list more useful application examples in the future.

    CAD Data Limitations

    1. Assembly data shows the assembly drawings in the concept design phase. The sole purpose of the data is to explain the structure and functionality of the assembly and is not considered nor to be used as a final design.
      You will need to edit the Data so that it meets your specific design conditions.
    2. Unit assembly Data consists of some sub-assemblies.
      It is configured so that each sub-assembly unit can be used as it is or edited.
    3. * The part in the frame is a sub-assembly unit.

    4. The Data for fabricated parts is based on easy-to-edit dimensions and shapes in sketches and histories.
    5. The Data including the third-part components are made by the Company.

    Page top

  • * Unit assembly Data consists of some sub-assemblies.
       It is configured so that each sub-assembly unit can be used as it is or edited.

Application Overview

Purpose

  • Purpose
    • Fixed stroke cylinder positions workpieces of different sizes.
  • Operation
    • This mechanism is installed on both sides of the workpiece.

Points for use

  • The clamping distance can be adjusted.
    The initial position is set by adjusting the height of the stopper and fixing it with a nut.

Target workpiece

  • The widths of the workpiece differ depending on the model.
    Different widths: 3 positions
  • Width (1): W80mm
  • Width (2): W86mm
  • Width (3): W92mm

Design Specifications

Operating Conditions or Design Requirements

  • Outer dimensions: W200 x D150 x H95mm

Required Performance

  • Positioning accuracy: ±0.5mm

Selection Criteria for Main Components

  • A compression spring is chosen based on the operating force and pulling power of the stopper/knob.

Design Evaluation

Verification of main components

  • The workpiece retaining force and the operating force of the knob with a claw are verified based on the selected spring load.
  • Confirmation of operating force of knob with a claw
    • Conditional Value:
      Different widths: 3 positions
      Height (1): W80mm
      Height (2): W86mm
      Height (3): W92mm
      Spring constant: K = 0.29N/mm
      Initial spring contraction amount: L1 = 7mm
      Adjustment amount: L2 = 6mm (3 steps by 3-mm increments)
      Distance from the stopper end face to the tip of the claw of the knob with a claw in Height (1) state: L3 = 2mm
  • Retaining force at each step
    • Spring tension in Height (3) state: P1 = K x L1, therefore, P1 = 0.29 x 7 = 2.03N
      Spring tension in Height (2) state: P2 = K x (L1 + L2), therefore, P2 = 0.29 x (7 + 3) = 2.9N
      Spring tension in Height (1) state: P3 = K x (L1 + L2 x 2), therefore, P3 = 0.29 x (7 + 3 x 2) = 3.77N
  • Operating force
    • Distance needed to remove the claw of the knob with a claw from the stopper:
      L4=(L1+L2×2+L3)=7+3×2+2=15mm
      The operating force for step change: F1 = K x L4, therefore,
      F1=0.29×15=4.35N

Other Design Consideration

  • The accuracy of each height is determined by the manufacturing quality of the stopper.

Explore Similar Application Examples

Page - / -

Part List

No. Part Name Sample Picture MISUMI Part Number
(click the Part Number below for details)
Quantity
1 Metal Washers MGCLF20-50 1
2 Soft Urethane FANAS-SUD-T3-A85-B50-L85-X11-F60-H10.5-G64-N5-V60-S20-W20-NA5 1
3 Soft Urethane VUR10-55 2
4 Low Head Cap Screws SFHZ10-80-M6-N6-H23 2
5 Sensors for Air Cylinders FWSS-D14-V6.5-T1 2
6 Flow Rate Control Valves AZFS-D30-V9-H8-G12-L15-N 2
7 Air Cylinders AZS6 2
8 Ball Bearing CBS6-25 2
9 Ball Bearing MD13L1 2
10 Ball Bearing SPSNL4-1 2
  • The part list above only contains MISUMI parts.
    Part list download (CSV) includes MISUMI and third party components used in this example.
  • TERMS AND CONDITIONS FOR USE OF CAD DATA
    Your access to the CAD data that MISUMI Corporation (hereinafter referred to as the Company) posts on this site (including 3D CAD data, intermediate 3D CAD data and 2D CAD data; hereinafter referred to as the Data) are of products manufactured and/or sold by the Company (hereinafter referred to as the Products) assumes that you have read and accepted these terms and conditions which govern your use of the Data. If you do not agree to these terms and conditions, you must stop using this website and the Data. You must not use the Data for any unlawful purpose or in any manner inconsistent with these terms and conditions.
    1. CAD Data
    The Data is prepared for assisting the Company's users in the CAD design process by providing dimensions and other Product information. In order to provide the best speed and stability working within this site, the Product drawings were simplified to reduce the size of the Data. For instance, some of the Products are shown without the oil groove shape, screws or spring shape. Also, please be aware that the tolerance, surface roughness and/or chamfer of the Data may vary from the actual Products.
    2. Disclaimer on Data
    While the Company has carefully prepared the Data, accuracy of the Data is not guaranteed and is subject to the variances as described above. The Company may also modify, add or delete the Data at any time without prior notice. The Company assumes no liability for any direct, indirect, consequential or special damages that you may claim resulted from your use of the Data or any changes to or deletions of the Data regardless of the reason. The Company provides no warranty as to the quality, accuracy, functionality, safety or reliability of the combination of Products and parts. Example applications and combinations of the Products are provided for illustrative purposes only.
    3. Copyright
    Copyrights to the content and the Data belong to the Company or the manufacturers of the Products. The said copyright is protected by the Copyright Act and international treaties. The use (including duplication, modification, uploading, posting, transmission, distribution, licensing, sales and publishing) of the Data except for the purpose to use the Data described above without prior approval of the Company is not allowed. The Data cannot be used for any purposes (including sales promotion) except for designing your machine. If you violate this provision or the laws or regulations, the Company may prohibit you from the use of the Data, the Company’s site and/or take legal action. So long as you comply with these terms and conditions, the Company grants to you a non-exclusive, non-transferable, revocable license to access and use the Data for the sole purpose of assisting you in designing machines that incorporate products.
    In case that the CAD data is found to have been to be used for any purpose other than mentioned above or against the related laws, MISUMI may take legal actions, including the one for blocking the involved user from using CAD data and from accessing to the MISUMI site.
    4. Disclaimer of Warranty
    ANY AND ALL CONTENT APPEARING ON THIS WEB SITE IS PROVIDED FOR INFORMATIONAL PURPOSES ONLY. THIS WEB SITE, ITS CONTENT AND ITS LINKS ARE PROVIDED ON AN "AS IS" AND "AS AVAILABLE" BASIS AND ARE USED ONLY AT YOUR SOLE RISK, TO THE FULLEST EXTENT PERMISSIBLE BY LAW. THE COMPANY DISCLAIMS ALL WARRANTIES, EXPRESS OR IMPLIED, OF ANY KIND, REGARDING THIS WEB SITE (INCLUDING ITS CONTENT, HARDWARE, SOFTWARE AND LINKS), INCLUDING AS TO FITNESS FOR A PARTICULAR PURPOSE, MERCHANTABILITY, TITLE, NON INFRINGEMENT, RESULTS, ACCURACY, COMPLETENESS, ACCESSIBILITY, COMPATIBILITY, SECURITY AND FREEDOM FROM COMPUTER VIRUS. THE COMPANY WILL NOT BE LIABLE FOR ANY DAMAGES OR LOSSES, INCLUDING DIRECT, INDIRECT, CONSEQUENTIAL, SPECIAL, INCIDENTAL OR PUNITIVE DAMAGES AND/OR LOST PROFITS, IN CONNECTION WITH USE OF THE INTERNET, THIS WEB SITE, ITS CONTENT OR ITS LINKS
    Further, the Company will not be liable to you for any failure or delay by the Company to provide access to the Data or any of its obligations under these terms and conditions where such failure or delay is the direct or indirect result of any circumstances beyond the Company's reasonable control (and the Company's obligations will be suspended for the duration of such circumstances).

    CAD Download (Unit Assembly)

    CAD Download: File Format
    生成

    Thank you for downloading the data.

    Click the Good IDEA! button when you find interesting design tips.


    This data is utilized in order to list more useful application examples in the future.

    CAD Data Limitations

    1. Assembly data shows the assembly drawings in the concept design phase. The sole purpose of the data is to explain the structure and functionality of the assembly and is not considered nor to be used as a final design.
      You will need to edit the Data so that it meets your specific design conditions.
    2. Unit assembly Data consists of some sub-assemblies.
      It is configured so that each sub-assembly unit can be used as it is or edited.
    3. * The part in the frame is a sub-assembly unit.

    4. The Data for fabricated parts is based on easy-to-edit dimensions and shapes in sketches and histories.
    5. The Data including the third-part components are made by the Company.

    Page top

Page top